


Copyright © 2008-2025. All rights reserved.
Careforhair.co.uk is a part of
Eighty Done AB
nov
12
2013

Gorgeous Braided Hairstyles You Can Do In Less Than 10 Minutes
By Len
Various hairstyles have been in the “in” scene sporadically, but never braids. They’re a constant. They are much loved, much used and much reinvented. We heavily applaud modern women’s fantabulous innovations of this intricate ‘do! Hairstyle ingenuity at its finest, people!
Plaits are not merely a form of hair art. In olden times, braids were used as a symbol of status, wealth, a means of seduction and, believe or not, to ward of head lice!
Whether you’re going out on a date or just want to unleash your inner Frida Kahlo, here are a couple of gorgeous braided hairstyles that you can do in 10 minutes or less!
Triple Braid Tutorial

Photo Courtesy: Hairromance.com
Don’t let the simplicity of this hairstyle fool you! The aesthetic impact is major! Wiggle your fingers and get ready to try this beautiful triple braided coif from Hair Romance! Ready?
1/ Start with clean, dry hair. Brush your hair thoroughly to remove tangles and for some sheen.
2/ Do three equal sections first. French braid the first section (left most) and clip the rest.
3/ Do the same to the middle section….
4/ ….and the third one (right most). Secure each with clear elastic.
5 & 6/ French braid the three braided sections and you’re done! Easy peasy!
Crown Braid Tutorial
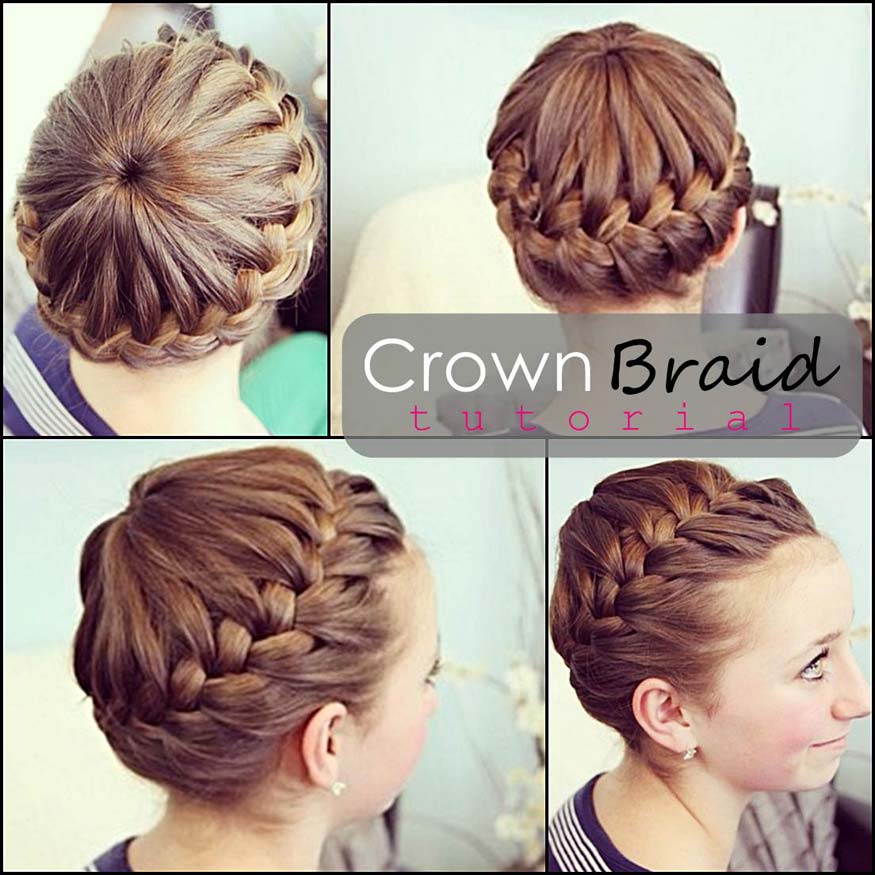
Photo Courtesy: Cutegirlshairstyles.com
Before you give up after you’ve gushed ‘beautiful’ to the braided hairstyle from Cute Girls Hairstyles above, please remember that nothing good comes easy. Here we go:
1/ Create two sections; section 1 should be at the crown of your head. Gather a circular section of hair on top into a ponytail leaving the surrounding hair (front, back and sides) loose. The latter would be section 2.
Tip: use thin elastic. Thick elastic will elongate your crown in a very unusual way.
2/ Do a deep side part at the front then arrange the ponytailed crown in a circular pattern neatly. Your hair should be covering your face and the rest of your head.
3/ Start the braid behind your left ear. Get hair from section 2 and some from section 1 as you go around. Do this all around your head until you reach the ends of your hair. Secure it with elastic.
4/ Tuck and pin the loose braided part (tail) of your hair to the side neatly. Make sure that the tail will blend well into the main area for a clean continuous style.
5/ Now, give yourself a pat on the back for doing a job well done! Don’t forget to take selfies!
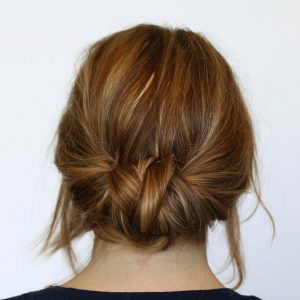
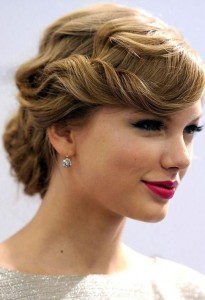
Braided Updo Tutorial
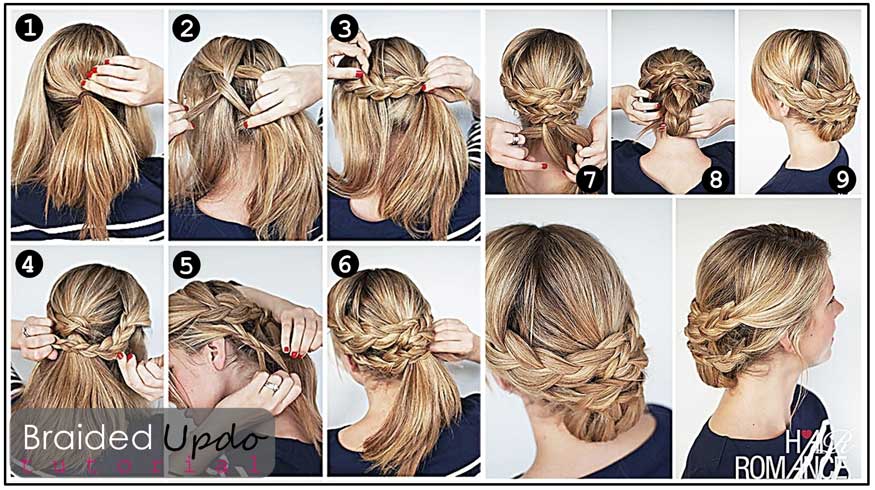
Photo Courtesy: Hairromance.com
Here’s another romantic braided updo that’s perfect for brides or for proms! Make it extra exquisite by adding embellished pins or fresh flowers!
1/ Choose a part that will suit you best before sectioning your hair into three. Do a ponytail with the middle section.
2,3,4/ Create a sub section (lower) on the left main section (upper) of your hair. Braid the upper part of the left side first then wrap it around the base of the ponytail and pin it. Do the same on the right side.
5 & 6/ Braid the lower section of the left and right sides then wrap it around the base of the ponytail and secure them with pins.
7 & 8/ Braid the middle section (ponytail) and tuck it in towards your nape. Secure it with bobby pins.
9/ Elegant updo that will surely draw double takes!
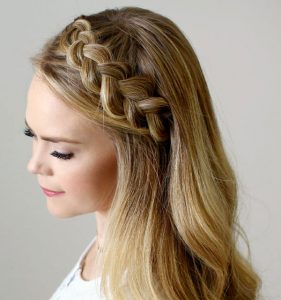
Dutch Braid Tutorial

Photo Courtesy: Hairromance.com
A Dutch braid is simply a reversed version of the French braid. The braid will be on top of the hair instead of under it as in the case of the latter. The trick here is to always go under, not above.
1 & 2/ Start at the front by dividing hair into three sections.
3 & 4/ Start the braid by putting the left section under the middle, then the right section under the left section.
5 & 6/ Continue doing the Dutch braid, making sure that you tighten as you go.
7/ Tie the end with elastic.
8/ Pull out to loosen the braid and make it a little wider.
9/ Coil the tail and pin it to create a braided bun.
10/ Perfectly plaited coif!
Filtrera